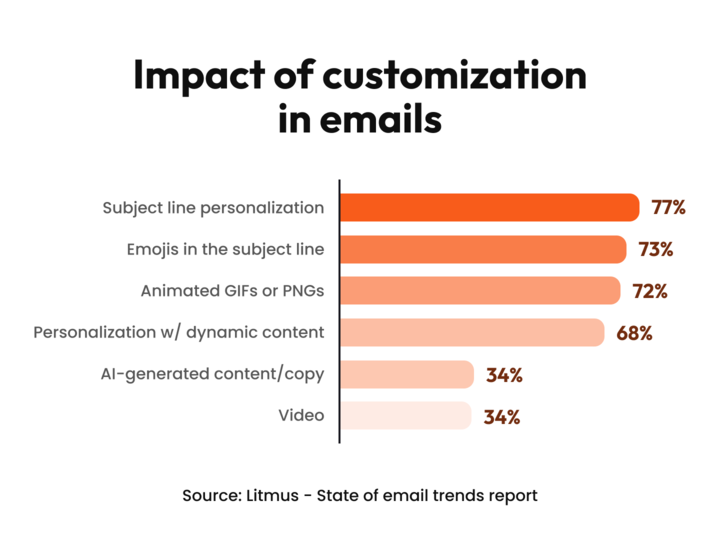
80% of marketers say customers respond better to email with personalization elements (Litmus, 2024). If you’re still not customizing WooCommerce emails, you’re already behind the competition.
With Gen-Z prioritizing personalized customer experience, still using the default template as such puts you at a disadvantage.
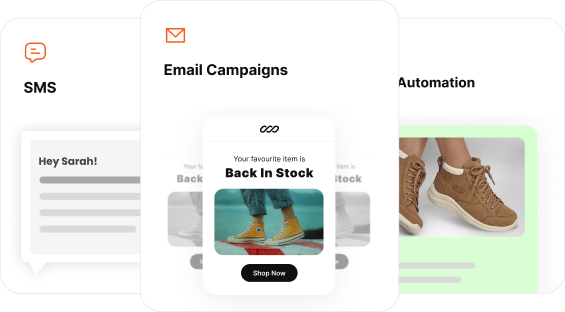
Customizing WooCommerce email templates lets you create an engaging, personalized, and on-brand customer experience.
That’s why in this article, we’ve covered
- How to customize WooCommerce emails using the simple default editor and advanced code hooks
- Best free plugin recommendations to edit WooCommerce templates.
- Steps to customize your WooCommerce emails with a plugin
By the end, you’ll know how to create custom email templates for WooCommerce and thus enhance your brand presence and boost customer engagement.
Automate all your WooCommerce email campaigns with Retainful’s pre-built workflows and templates in minutes.
Why You Should Customize WooCommerce Emails?
Customizing your WooCommerce email templates transforms simple transactional emails from generic notifications into powerful, on-brand marketing tools.
When you invest in advanced WooCommerce email customization, the impact on your business metrics is significant:
- Increased conversions: You can personalize Calls-to-Action (CTAs) based on the customer’s history or stage in the buyer’s journey.
- Personalized CTAs convert an impressive 202% better than generic ones.
- Enhanced customer trust & response: Personalization in email (like addressing the customer by name) creates a more memorable shopping experience.
- 80% of marketers say customers respond better to email with personalization elements.
- Higher customer loyalty and repeat sales: Personalized shopping experiences reinforce brand identity and make customers feel valued, increasing retention.
- Personalized shopping experiences lead to a 60% increase in repeat buyers.
- Optimized automation & ROI: Customizing automated flows (like browse abandonment recovery) ensures timing and emails are targeted for maximum recovery.
- Customized automation flows generate up to 30 times (30x) the average Revenue Per Recipient (RPR) compared to one-time email campaigns.
- Brand consistency: Custom templates ensure your brand’s identity, colors, and voice are consistent across every customer touchpoint.
Types of default WooCommerce email templates
WooCommerce comes with a number of default order notification email templates that you can customize to match your branding and personalize the emails to an extent.
As each template serves a specific purpose in the customer journey, understanding these default templates can help in email customization.
Here are the essential default WooCommerce email templates you can customize:
- New Order – Adding an admin name and a personalized greeting, or including order priority flags (high-value, VIP customer)
- Cancelled Order – Adding a cancellation reason dropdown selection or customer retention workflow triggers
- Failed Order – Adding specific error code descriptions, including payment retry automation links, or technical support escalation options
- Order On-Hold – Adding a personalized customer name, including estimated review timeframes, and adding payment completion instructions
- Order Processing – Adding the customer name and order celebration, including estimated shipping dates, or adding a tracking number preparation notice
- Order Completed – Adding the customer name and thank you message, or including review request buttons
- Order Refunded – Adding the customer name and apology message, including a refund amount breakdown, or adding processing timeline information
- Customer Invoice – Adding customer name and invoice number, including one-click payment buttons, or adding payment deadline reminders
- Customer Note – Adding customer name and personal greeting, including order context information, and adding store owner signature and photo
- Password Reset – Adding the customer name and security greeting, including the account activity timeline, and adding password strength requirements
- New Account – Adding the customer name and a personalized welcome, including an account setup checklist, or adding new customer discount codes
- Back-in-Stock Notification – Adding customer name and product interest, including product images and current pricing, or adding limited quantity urgency messages
You can see that every email in WooCommerce is sent when an action triggers it. Therefore, you will need to make sure you enable the emails in the list.
5 Key benefits of customizing WooCommerce email templates:
- Here are the 5 key benefits of customizing WooCommerce email templates.
- Enhanced customer experience: Customized WooCommerce order emails create great brand experiences that give positive customer impact and build long-term loyalty through professional, personalized communications.
- Increased engagement and conversions: Generic templates will not inspire action, while customized emails with unique style, color palettes, and brand messaging motivate customers to complete desired actions and drive sales.
- Advanced segmentation capabilities: Template customization with targeted messaging for different customer segments will allow you to deliver personalized offers that resonate with specific audience behaviors.
- Brand consistency across touchpoints: Custom email templates ensure your brand identity is consistent throughout the entire customer journey, thus bringing recognition and trust at every interaction point.
- Improved performance metrics: Well-designed, personalized emails typically achieve higher open rates, click-through rates, and conversion rates compared to standard templates.
How to customize WooCommerce emails with default settings?
WooCommerce has global settings that allow you to customize some elements of your WooCommerce emails like – the sender name, email address, and subject line.
Furthermore, proper SMTP setup for WooCommerce emails ensures reliable delivery and helps improve open rates of WooCommerce transactional emails by up to 25%.
Let’s see how to customize WooCommerce emails using Default Settings – without a plugin.
Step 1: Enable the transactional emails in WooCommerce
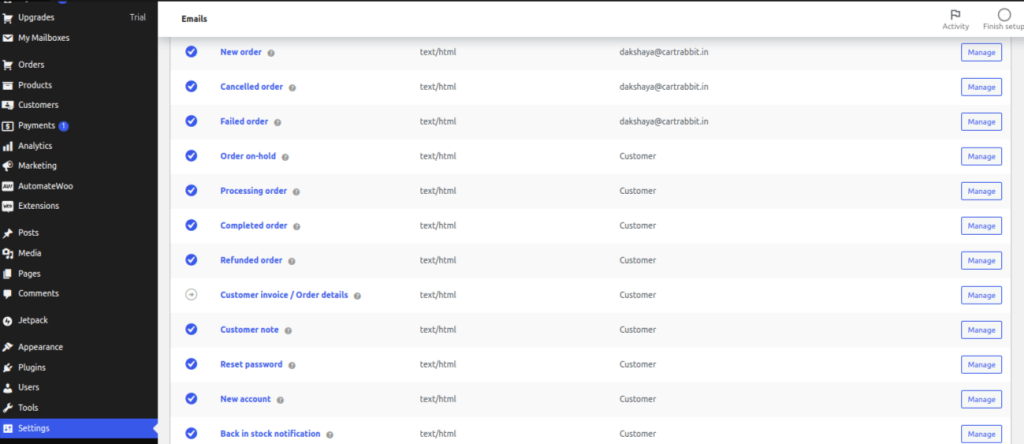
To customize WooCommerce emails without a plugin, go to WooCommerce -> Settings -> Emails.
You will see a list of default WooCommerce order emails under the Emails section.
You can see that every email in WooCommerce is sent when an action triggers it. Therefore, you will need to make sure you enable the emails in the list. Thus, configure transactional email deliverability WooCommerce settings to ensure optimal inbox placement.
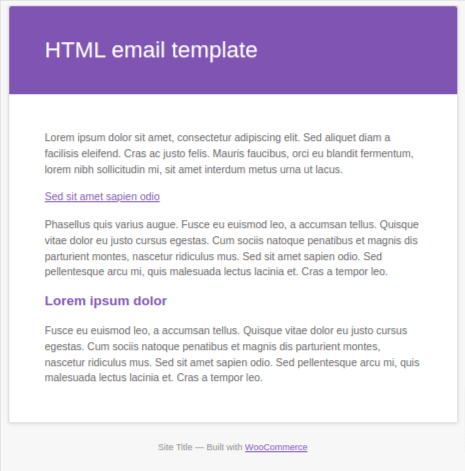
Step 2: Customize WooCommerce email template branding
If you scroll below the list of email templates in Settings → Emails, you’ll see more customization options. Changes you make here will be updated to all of your WooCommerce order email templates at once.
The image below is an example of how you can edit WooCommerce order confirmation email template branding.
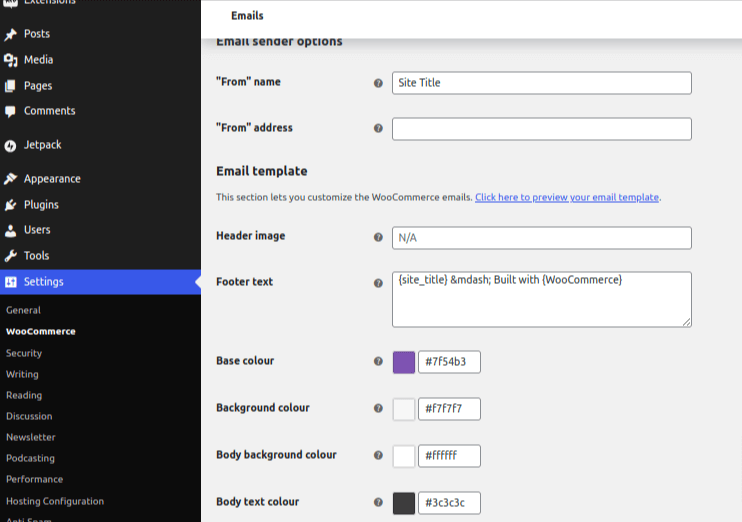
You can change the header image, footer text, base color, background color, body background color, and body text color.
Thus, this section allows you to customize woocommerce email CSS styles and create a consistent woocommerce email header and footer design across all templates.
Step 3: Edit WooCommerce email template elements
To customize WooCommerce email content, click the ‘Manage’ button beside the type of WooCommerce order notification email you want to edit.
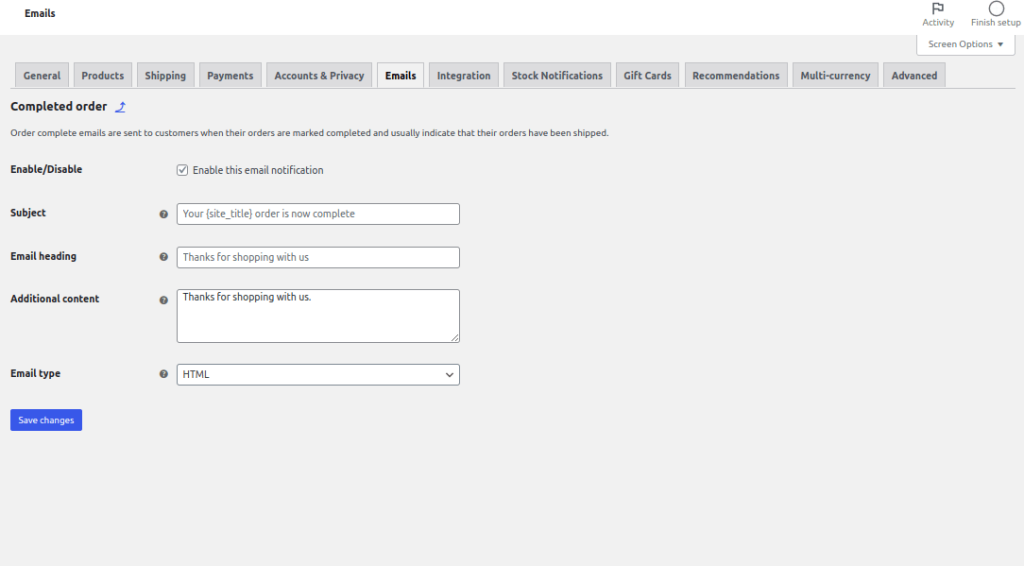
Let’s learn about every field in detail:
- Enable/Disable checkbox lets you enable or disable this specific email notification.
- Subject: Use this section to change the subject line in WooCommerce email. You can also add placeholders in this field, like
- {site_title}
- {site_address}
- {site_url}
- {order_date}
- {order_number}
- Email heading – You have to specify the heading of the email.
- Additional content – The text you add here will be visible in the body of the email. You can use the placeholders here as well.
- Email type – You can specify the format of the email, like
- Plain text – Emails sent with no formatting and no graphics.
- HTML – Emails sent with simple graphics.
- Multipart – Both formats are sent.
To include the custom field in the WooCommerce email, you can edit the code in the theme’s functions.php file or use a WooCommerce email customizer plugin to customize with zero complexity.
Editing WooCommerce email templates using HTML code:
i) Using WooCommerce email hooks:
WooCommerce email hooks let you dynamically insert or edit WooCommerce email content at specific points – like adding an order summary, tracking info, or custom messages.
WooCommerce Email Hooks
- woocommerce_email_order_details – Customize the order summary details in WooCommerce emails.
- woocommerce_email_order_meta – To add custom fields to the WooCommerce order emails.
- woocommerce_email_customer_details – Modify the customer information section in the email.
- woocommerce_email_before_order_table – Add content (e.g., a note) before the order table in the email.
- woocommerce_email_after_order_table – Add content (e.g., order tracking links) after the order table in the WooCommerce email.
- woocommerce_email_order_items_table – Customize the order items table.
ii) To include an order summary in WooCommerce emails using the default editor:
function custom_order_summary_in_email( $order, $sent_to_admin, $plain_text, $email ) {
?>
<h2>Order Summary</h2>
<table style=”width: 100%; border-collapse: collapse; border: 1px solid #ddd; font-family: Arial, sans-serif;”>
<thead>
<tr style=”background-color: #F4F4F4; text-align: left;”>
<th style=”padding: 10px; border: 1px solid #ddd;”>Product</th>
<th style=”padding: 10px; border: 1px solid #ddd;”>Quantity</th>
<th style=”padding: 10px; border: 1px solid #ddd;”>Price</th>
</tr>
</thead>
<tbody>
<!– Loop through order items –>
<?php foreach ($order->get_items() as $item_id => $item) : ?>
<tr>
<td style=”padding: 10px; border: 1px solid #ddd;”>
<?php echo esc_html($item->get_name()); ?>
</td>
<td style=”padding: 10px; border: 1px solid #ddd;”>
<?php echo esc_html($item->get_quantity()); ?>
</td>
<td style=”padding: 10px; border: 1px solid #ddd;”>
<?php echo wp_kses_post(wc_price($item->get_total())); ?>
</td>
</tr>
<?php endforeach; ?>
</tbody>
</table> }
Step 4: Preview the email template and test
You can click on the preview to see how your custom WooCommerce email template looks.
You can see that the options available are very minimal in the default WooCommerce email template customization option.
How to customize WooCommerce email templates with a plugin?
To add custom email notifications to WooCommerce and send highly branded WooCommerce emails, you should use a WooCommerce email customizer plugin.
Retainful is an all-in-one WooCommerce email marketing plugin that simplifies how you customize WooCommerce emails with:
- Pre-designed template library
- Drag-and-drop email editor
- Easy-to-setup email automation
Here is how you can customize WooCommerce email templates using a WooCommerce email customizer plugin – Retainful.
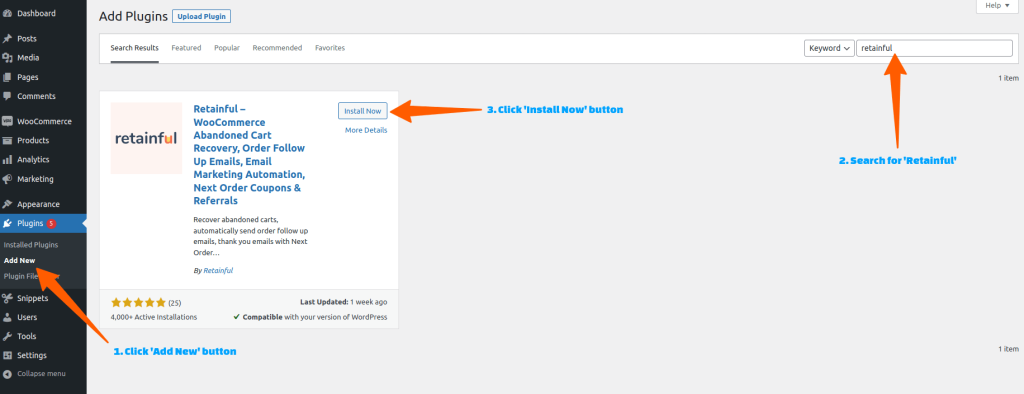
Step 1: Install the Retainful Plugin
To customize WooCommerce email templates with a plugin, go to your WordPress dashboard → Plugins → Add new. Search for the ‘Retainful’ plugin.
Click “Install Now” to install and activate it. After installation, connect your WooCommerce store with Retainful to create custom email templates in WooCommerce.
WooCommerce stores using Retainful are recovering an average of 30% of abandoned carts. Yours could be next.
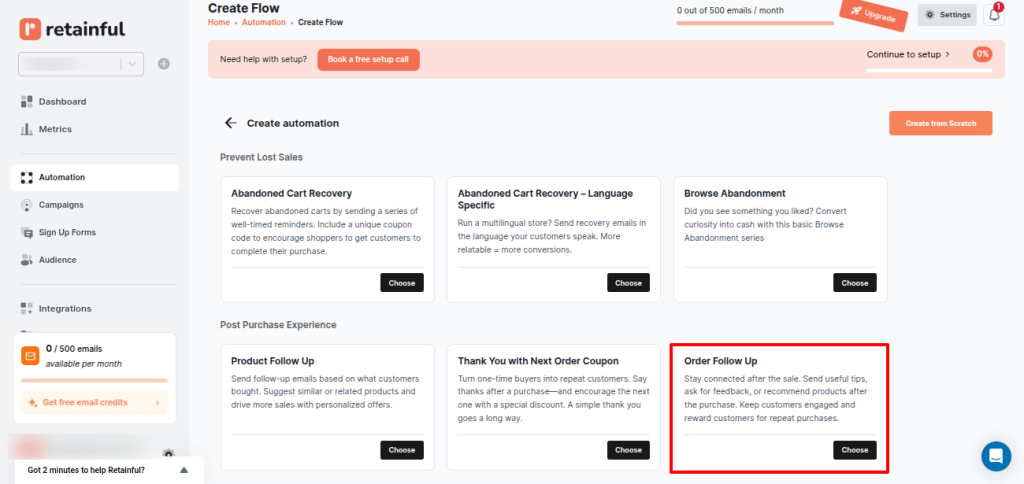
Step 2: Choose the order follow-up email automation
Retainful allows you to send many WooCommerce order follow-up emails like order confirmation, order cancellation, order pending, abandoned cart recovery emails, welcome emails, thank you emails, post purchase emails and more.
To customize WooCommerce email templates, go to Retainful Dashboard -> Automation and click on Create Workflow.
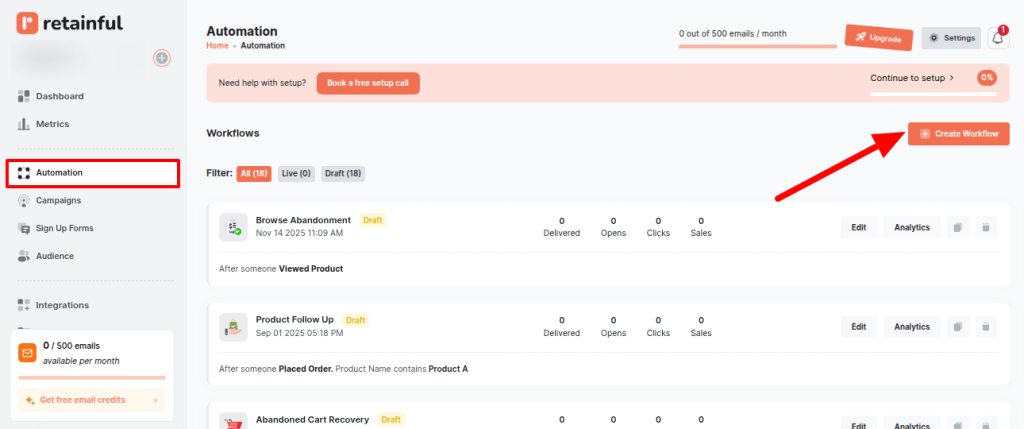
Let’s take a WooCommerce order confirmation email as an example and see how you can customize it.
Select “Order Follow Up” workflow under the post-purchase experience category.
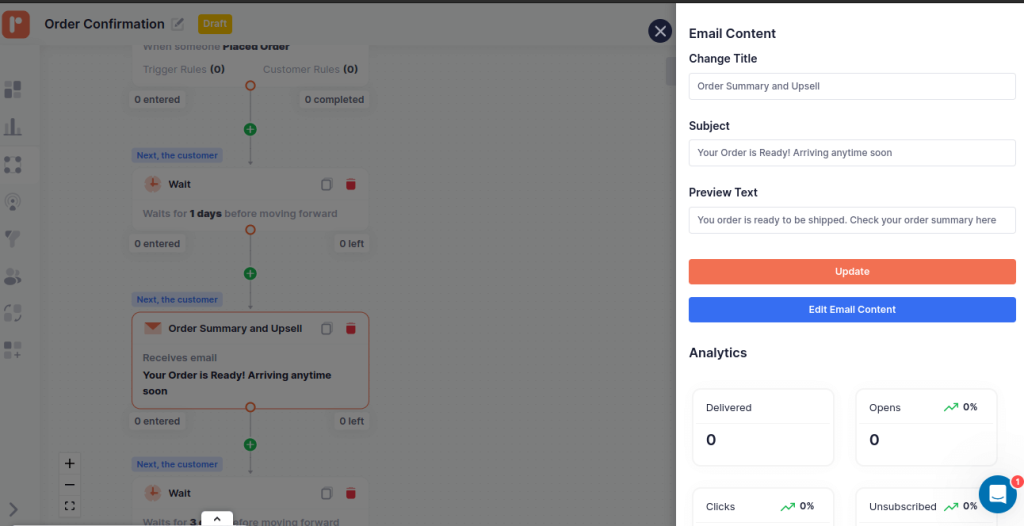
Step 3: Change subject line and preview text in WooCommerce emails
You will see an automation workflow containing triggers, wait time, and email blocks. Click the ‘Order summary and Upsell” and a tab will appear on the right side.
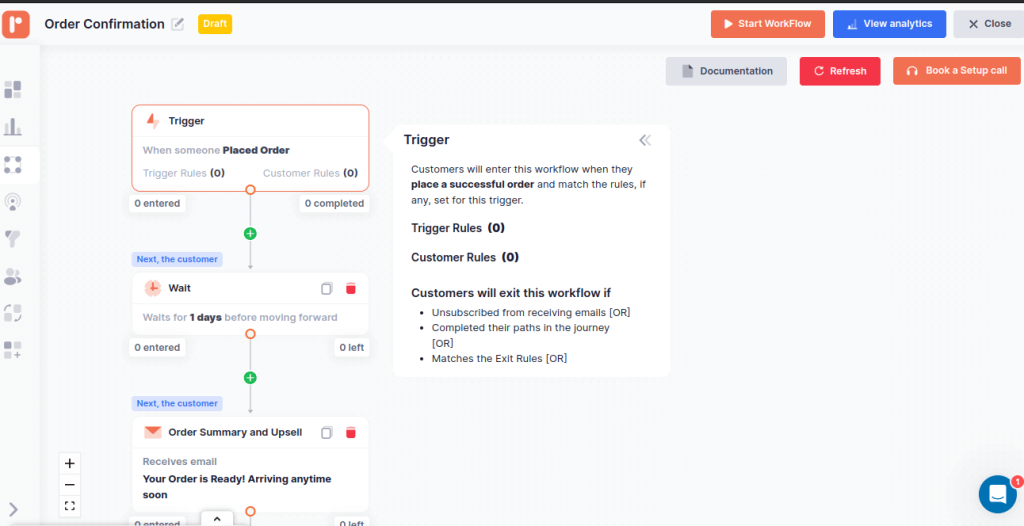
You can edit WooCommerce email template elements like email title, subject line, and preview text of your choice in the respective fields.
Step 4: Customize the layout of the WooCommerce email template
You have to create your custom email templates for WooCommerce with the structure of your emails in mind, like the location of images, text blocks, CTAs, and their size.
Click on “Edit Email Content” on the same tab to edit the structure. You will be taken to an email editor like the image below.
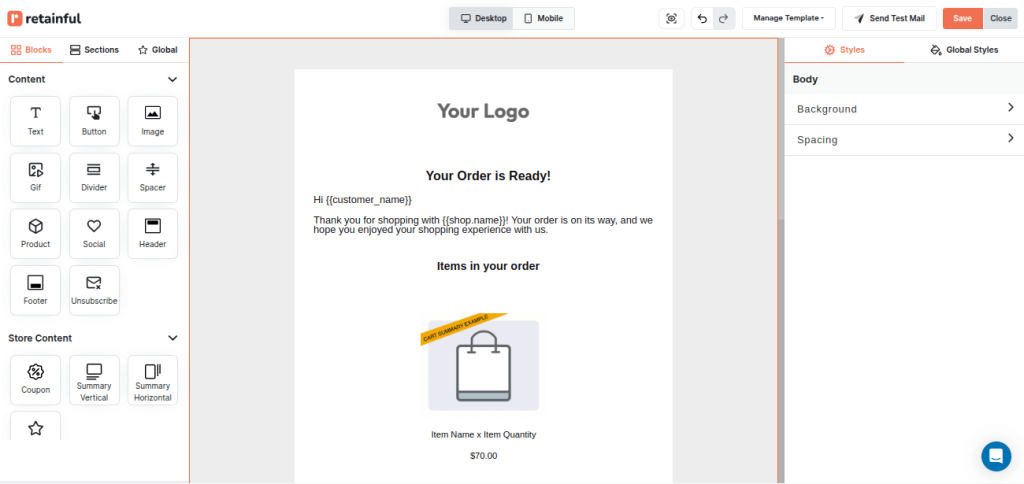
You can even include new blocks in your WooCommerce emails from the Blocks section, like:
- Text
- Button
- Image
- GIF
- Divider
- Spacer
- Product
- Header
- Footer
- Unsubscribe
- Coupons
- Order summary
- Reviews (Star ratings)
- Social (Facebook, Instagram, YouTube, X, WhatsApp, TikTok, LinkedIn)
This is where you can explore options to customize every element of your WooCommerce emails.
To explore more about the existing options in Retainful’s email editor, Check out our article
Step 5: Change the WooCommerce email content
To edit the WooCommerce email content, click on the blocks you want to edit. You will see a tab appearing on the right where you can set the style settings, and more.
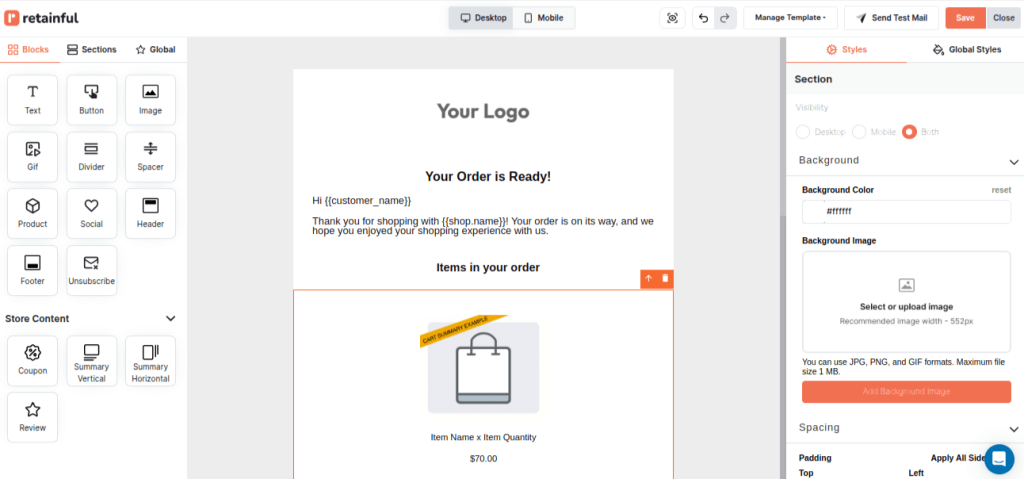
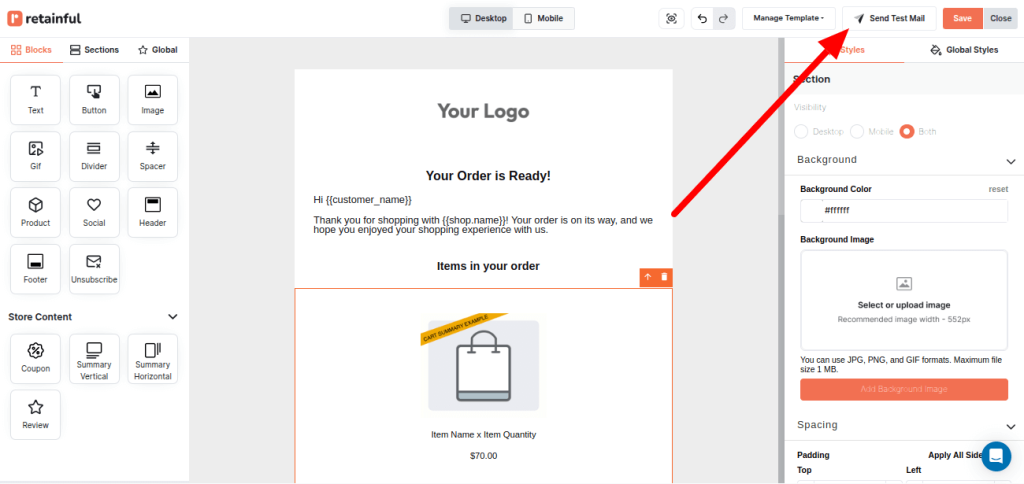
Step 6: Preview and send test email
As a final step, preview and test the customized WooCommerce emails , and you are good to go.
3 Best WooCommerce Email Customizer Plugins
The best WooCommerce email customizer plugins are:
- Retainful
- Spark Email Editor
- MailPoet
Let’s see these best WooCommerce email customizer plugins in detail.
1. Retainful
Retainful is the best WooCommerce email customizer plugin to design on-brand WooCommerce emails with an intuitive drag-and-drop email editor and ready-made templates.
It has ready-made templates for every e-commerce purpose like abandoned cart, order confirmation, product recommendation, win-back, and more – both transactional emails and life-cycle stage emails.
You can skip the design work and create eye-catching WooCommerce email templates even if you are not a design pro.
Design responsive email templates that look great on all devices and preview and test side-by-side.

- Forever free plan is available – With drag-and-drop editor and ready-made templates
- $14/month – 10,000 emails
- $69/month – Unlimited emails
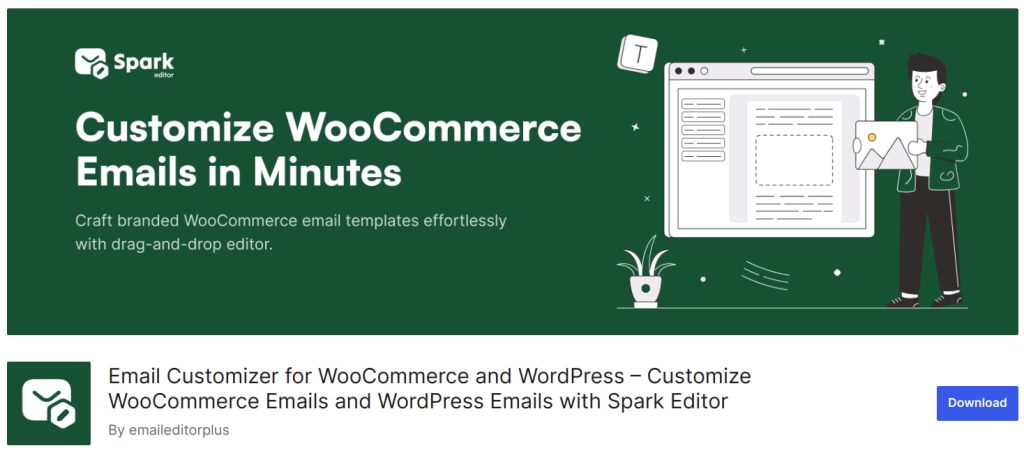
2. Spark email editor
Spark email editor is a WooCommerce email customizer plugin to customize all your WooCommerce transactional emails
You can customize every detail of your WooCommerce emails – add order details, customer address, personalize emails with short codes, change the logo using an intuitive editor with real-time previews.
Customize WooCommerce email templates effortlessly with Spark Editor’s drag-and-drop builder. Design professional, on-brand emails without coding. Enhance customer engagement by personalizing WooCommerce email templates with dynamic content, custom styling, and real-time previews.
Design Professional WooCommerce Email Templates in Minutes, Not Hours!
Pricing:
- $60/year – 1 site
- $108/year – 3 sites
- $236/year – 10 sites
14-Day Money Back Guarantee – Risk Free Purchase
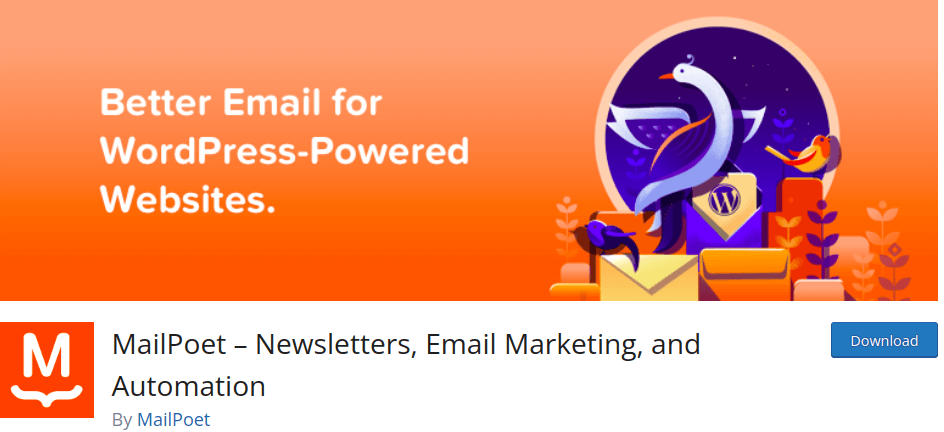
3. MailPoet
MailPoet WooCommerce email customizer plugin comes with a library of designed email templates for WooCommerce. These include templates for order confirmations, abandoned cart recovery, and customer follow-ups.
MailPoet supports dynamic content, such as customer names, order details, and product recommendations, pulled directly from your WooCommerce store.
MailPoet integrates seamlessly with WooCommerce, syncing your product catalog, customer data, and store activity.
Pricing:
- Free – 500 subscribers
- $9/month – 500 subscribers and unlimited emails
- $26/month – 500 subscribers/website
Use Retainful’s pre-designed email template to design branded WooCommerce emails effortlessly.
Wrapping up!!
By using WooCommerce plugins like Retainful and code customizations, you can customize WooCommerce emails that are both branded and personalized, ensuring they resonate with your customers.
Customizing WooCommerce emails doesn’t just enhance the user experience – it helps reinforce your brand identity and drive more conversions. With the right tool, your WooCommerce emails can become a great marketing asset rather than an afterthought.
Read these blogs to learn more about Email Marketing in WooCommerce.
- 10 Best WooCommerce Email Marketing Plugins to Boost Sales
- 10 Best Ecommerce Email Examples + Tips
- How to send WooCommerce Newsletters (+ Plugins)
Frequently Asked Questions
First, define your objective. Then, group your WooCommerce customers based on specific criteria like purchase history or interests to tailor your email content for higher relevance and engagement.
Utilize an email marketing platform compatible with WooCommerce to design responsive emails, incorporating compelling visuals, clear CTAs, and personalized content. Track the metrics and optimize.
To add custom email notifications to WooCommerce, first, install a WooCommerce email customizer plugin like Retainful, choose a pre-designed email template, customize the template elements, and test the email.
Tuesdays, Wednesdays, and Thursdays tend to have the highest email open rates. Many companies also see success on Sundays, especially for B2C brands. You can sen emails on official hours 9 AM – 5 PM.
To find WooCommerce email templates, go to WooCommerce -> Settings -> Emails.
To show the custom field in the WooCommerce email, you can edit the code in your theme’s functions.php file or use a WooCommerce email customizer plugin to customize easily.
You can either edit the code to edit layout, styling and include custom fields. To customize WooCommerce email templates effortlessly, use a WooCommerce email customizer plugin.
To change email body text in WooCommerce, go to WooCommerce -> Settings -> Emails. Click the ‘Manage’ button near the email Edit the WooCommerce email body content by